Since Cisco acquired Meraki way back in 2012, the two have worked in unison to provide high-quality goods and services across a whole range of fronts. Though the company enjoy a solid reputation, there is always space for a few errors in this business.
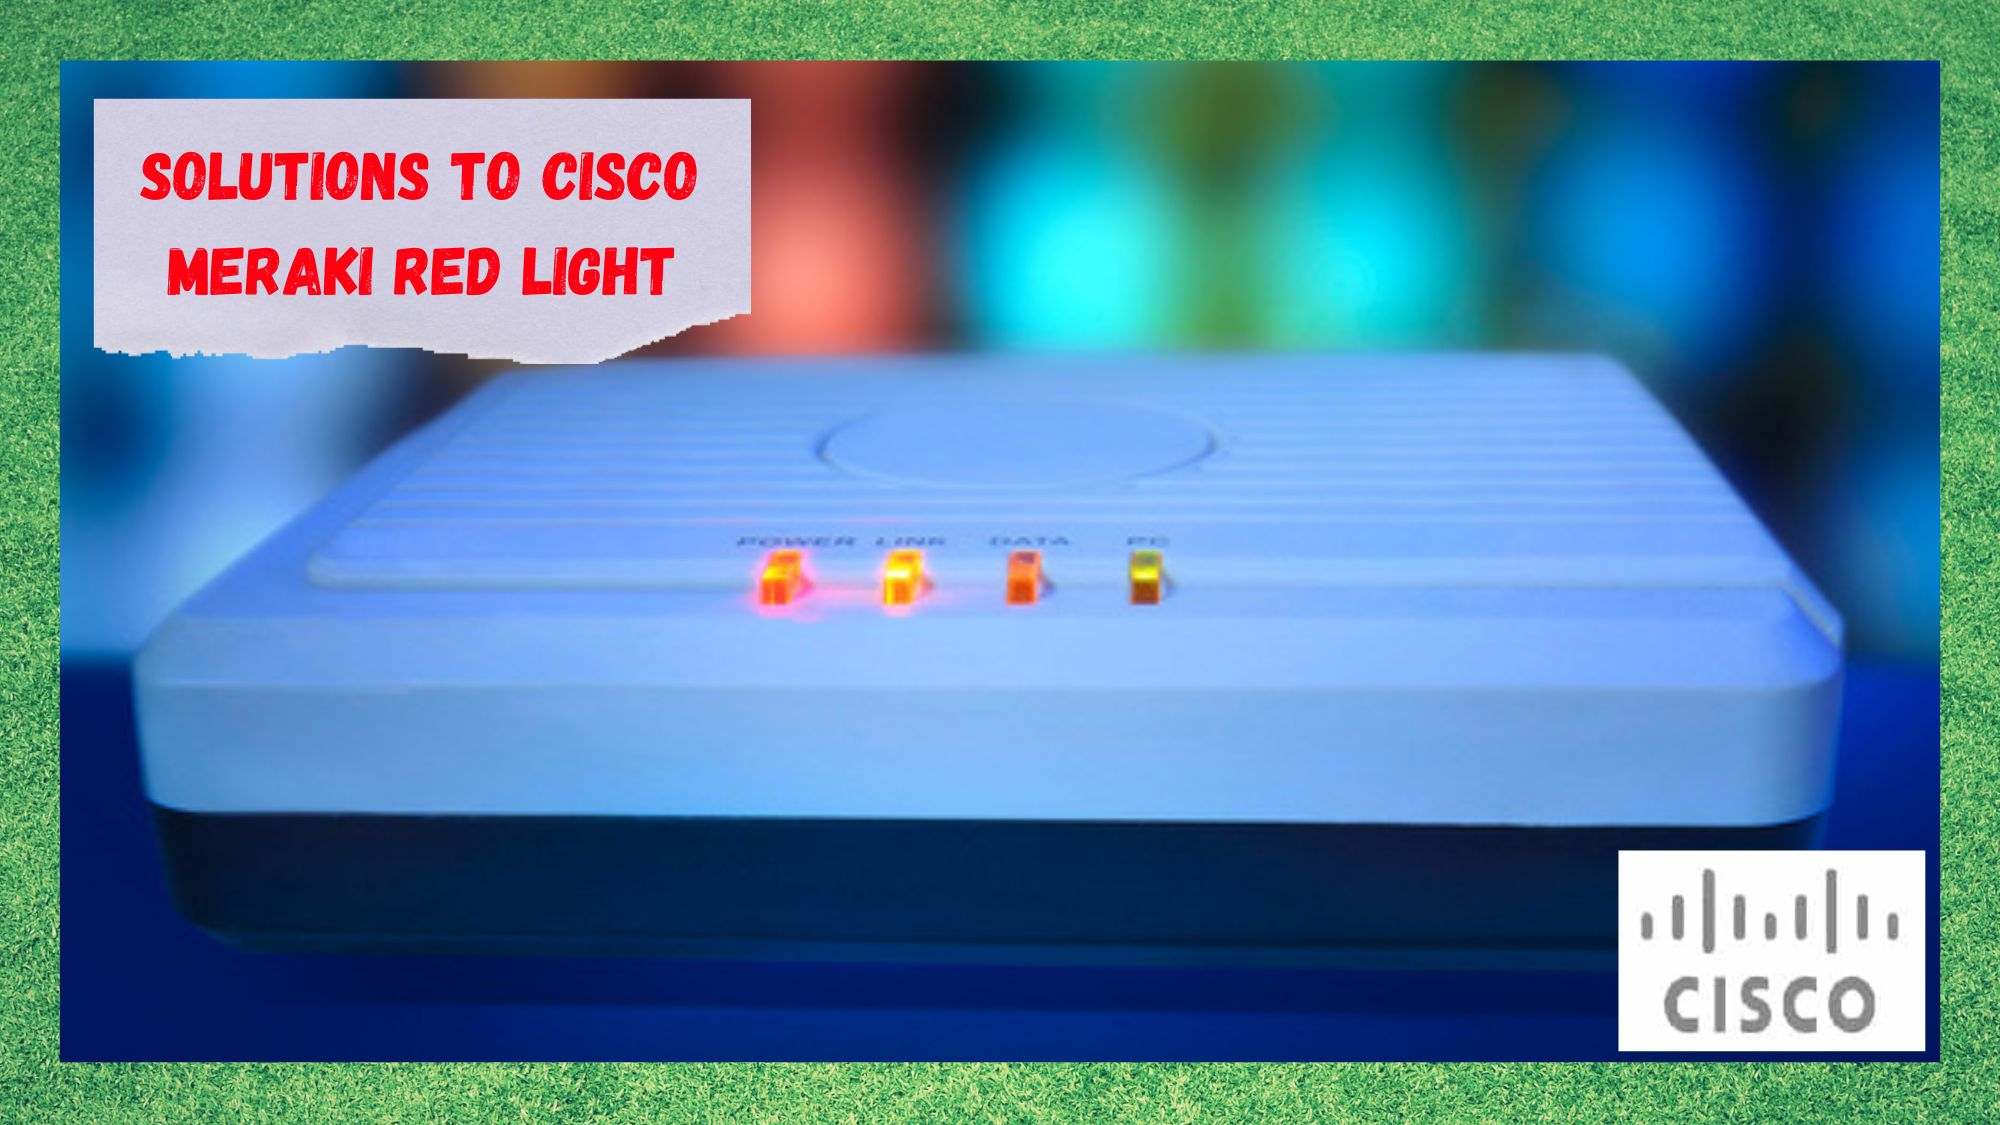
Most recently, their customers have been experiencing troubles with their network devices, in particular. The most common issue of these is by far the reed light issue. As most of you will already know, seeing a red light on your network device is rarely a good thing.
But the good news is that it most likely doesn’t mean the end is near. It can mean that, but not in all cases. The thing about this red light is that all it is designed to tell us is that there is a hardware problem or that, as vague as it seems, something has gone wrong.
They weren’t any more specific about the light than that. In most cases, we noticed that it can happen when the AP light has been orange for a prolonged period.
Because this problem can be serious enough that you may need to get the device replaced, we have put together this troubleshooting guides designed to rule out all possibilities that it is a minor error.
How To Fix The Cisco Meraki Red Light Problem
1. AP Cannot Connect

As we mentioned briefly above, the problem is often caused by the fact that the AP cannot connect. When this happens, an orange light will show to tell you it is struggling to do so. This light will blink for quite a while before it eventually gives up and just turns red.
To resolve this, the first thing you will need to check is that the access point is connected to the gateway. If you happen to have connected the AP using an Ethernet cable, this may well be the source of the issue. Make sure this isn’t the case and then try again. With a bit of luck, that should be enough to resolve it.
2. Check Your Cables

If you have tried the above fix but with no luck, this may point to there being an issue with the cable itself. When diagnosing these sorts of issues, we tend to look only at the bigger picture, forgetting entirely about the smaller parts of the setup. The thing is, these components are just as vital as the device itself.
So, to remedy this, we would suggest that you remove the Ethernet cable from the setup entirely. Now that you have done that, have a quick look to make sure that there are no clear signs of damage. The tell-tale signs will be things like fraying and, at worst, exposed innards.
If you think the cable is still in decent condition, you can put it back in again. Make sure that the connection is as tight as can be and that there are no sharp bends along the cable. If you feel that you need to replace the cable entirely, make sure you get your hands on a CAT5 Ethernet cable. Others may end up giving you problems.
3. AP Not Receiving an IP Address

If the cabling wasn’t the issue, the next most likely thing to be holding you back is that the AP may not be receiving an IP address from the DHCP server. When this happens, it means that your access point will not have a static IP address to work from, which is a problem.
Effectively, this totally rules it out from working as it should. The only way to resolve this is to make sure that your DHCP server is both operational and reachable. It is also a good idea to double-check that your DHCP pool has IP addresses that can be leased.
4. Try a Factory Reset
Every now and then, these sorts of issues can be caused by something as minor as a few settings that are a little off. When settings are incompatible with each other, they can actively work against each other and grind everything to an absolute halt.
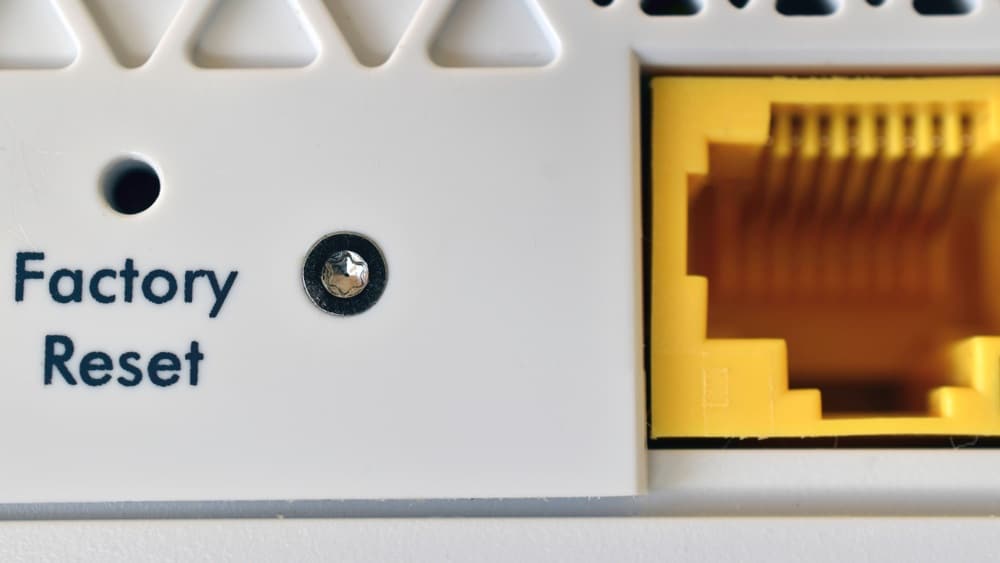
Performing a factory reset will clear out any setting changes you may have made that could have caused this. It will also get rid of any bugs or glitches that may have accumulated in the system over time. If you have never reset the device before, the process couldn’t be simpler.
All you will need to do first is grab a paperclip or a similarly small object before you get started. First up, you will need to find the reset button, which is around the back of the access point. You will need your paperclip here to push in the tiny button and hold it there for about 15 seconds.
Basically, once the power light goes off on your AP, you can then let go of the button. Once that is done the AP will have been reset to the same settings it left the factory with. All that remains is to turn it on again and see has the red light disappeared.
5. Get in Touch with Customer Support

If you have made it this far and haven’t had any luck yet, the chances are that the outcome isn’t going to be all that positive.
We hate to be the bearers of bad news, but the issue is now more than likely to be a major hardware fault, which we couldn’t possibly expect you to fix. At this point, the only logical course of action that remains for you is to get in touch with customer support about the issue.
While you are talking to them, make sure to mention all of the various methods you have tried to get it fixed. As this problem has been around for a while now, it is possible that they will have an additional fix or two available that we don’t know about yet.