The Linksys extender is without a doubt one of the most dependable Wi-Fi extenders on the market. Its interactive interface and simple setup process have earned it a high rating among other Wi-Fi extenders. However, you should expect problematic situations with these devices, such as connectivity issues and weak signals, which will necessitate a reset. If you’re reading this, you’re probably looking for a solution to a similar problem, so we’ll walk you through the process of how to reset your Linksys extender RE7000.
How to Reset Linksys Extender RE7000
If despite an active internet connection, your Wi-Fi extender is not providing a stable and consistent connection, you should consider resetting your extender. This can either be done using the reset button or accessing the web-based setup page to factory reset your extender. We will discuss both ways.
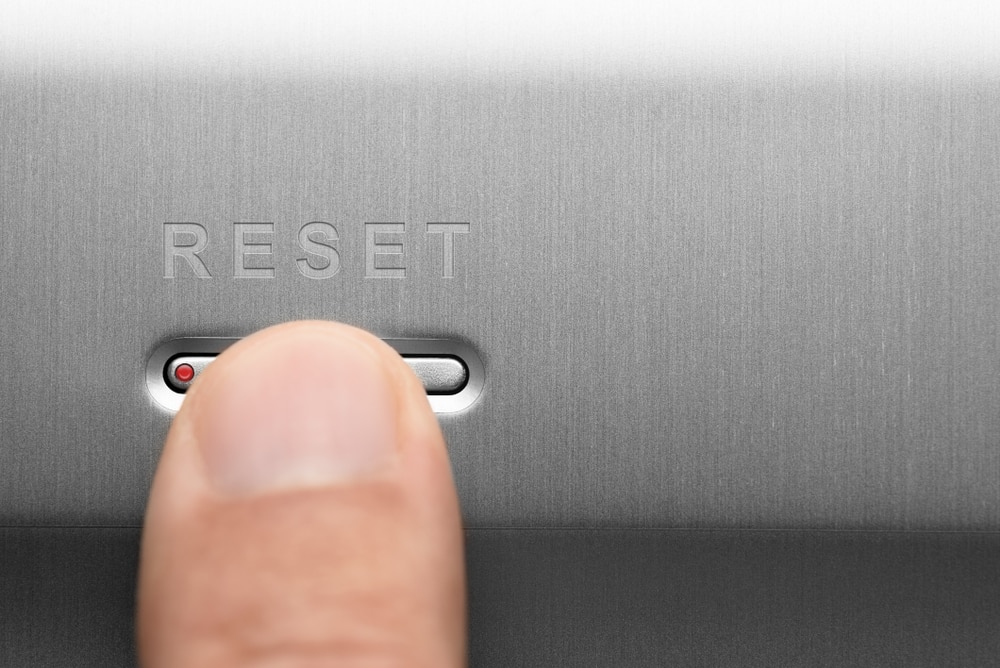
1. Reset Through Button:
The reset through button also referred to as manual reset is quite a basic resetting technique that does not involve complicated procedures. Therefore if your extender is taking too long to connect to configured devices, or is frequently disconnecting then.
- Make sure your Wi-Fi extender is turned on.
- Locate the RESET button on your device. The location of the button may vary depending upon your Wi-Fi extender model.
- Press and hold the reset button for 8 seconds.
- Release the button and notice the LED changes in your device.
- Your RE7000 Wi-Fi extender is now manually reset to its factory version.
2. Reset Through Web-Based Setup Page:
In case your reset button is broken or faulty you can always reset your Wi-Fi extender by accessing its web setup page. For this process
- Connect your Wi-Fi extender to a power source and wait for it to turn ON.
- When the lights on the device get stable open the web browser on your device and type in the default IP address 192.168.1.1 in the address bar.
- Once you access the setup page, log in to your account using your configured username and password.
- After you log in to the page, navigate to the Administration tab.
- Select the Factory Defaults option under the administration tab.
- A Restore Factory Defaults button will be displayed. Click the button.
- Now your RE7000 Wi-Fi extender is restored to its factory defaults.
It is also recommended that you disconnect your Wi-Fi extender from the power source after the reset by disconnecting its power cord and leaving it OFF for several seconds. Turn on your device once it has stabilized.
You should be aware that when you perform a factory reset on your Wi-Fi extender, all customized settings, including configured devices, router connection, and network credentials, will be erased. This means you’ll have to configure your Wi-Fi extender from the start. A restart is usually not recommended to solve minor issues. If your only issue is with connectivity and range, it is always a good idea to power cycle your device.