Having a wireless network is a more than common part of a household or an office. With internet connection demands growing by the day, the need for a reliable network has become paramount.
Since the advent of the IoT, or the Internet of Things, home and office appliances started performing new kinds of tasks through the use of an internet connection.
Other devices, such as cable TV set-top boxes, were suddenly able to deliver streaming content and offer users functions that enabled a bigger control of the Live TV content they received through the service. It is ludicrous to imagine life without an internet connection nowadays.
Surely, there are those who try and hide in the mountains to feel cast away from society, but these are a minority. Most people use internet connections their whole day, from the moment they wake up until they fall asleep at night.
And, being so easy to constantly live in a virtual world, it’s no wonder the ones that opt for a life away from it have so much trouble. However, with this transition to the virtual aspects of communication, and work, and with so many apps and features that allow people to go by their whole lives online, the need for security has also increased.
As it goes, the simple fact of having an internet connection already makes you a target for those who seek to either freeload or break into your network. Most recently, users have been complaining about finding unknown names on the list of connected devices.
Among the names, AMPAK has caught the eyes of several users. As they seek answers as to why AMPAK is showing up on the list of connected devices, we came up with a set of info that should help you further understand AMPAK and how to get it off the list, should you need to.
Why Is AMPAK Technology On The List Of Connected Devices?
Since users first began noticing weird names on the list of devices connected to their networks, the need for enhanced security features started growing.
Since users can never tell if the extra connected device is simply the work of a freeloader or if it is some kind of threat, the best idea should always be to have it disconnected and removed from the list. Nevertheless, not every strange device on the list is necessarily a threat.
Some IoT devices have quite unintelligible names that lead users to misunderstand them for possible menaces and have them disconnected. Upon realizing that the weird name refers to their home or office appliances, they connect the device to the wi-fi again.
So, if you are noticing any AMPAK names on the list of devices connected to your wi-fi, check the info below and come to a better decision as to what to do.
What Is AMPAK Technology On My Network?
For those who are not acquainted with the name, AMPAK is a multimedia company that manufactures telecommunication devices. Among their most known products are HDMI-based devices, wireless SiP, access points of a variety of types, wi-fi modules, TOcan packages, and routers.
As you can see, AMPAK is quite busy in the network devices world. They deliver network solutions to a large range of companies, which, in their turn, opt for the same provider when manufacturing their own devices.
However, since manufacturers understood the need to call their devices’ network names by the same name as the product, AMPAK hasn’t been appearing that much in connected devices lists anymore. Additionally, users couldn’t pinpoint which device was connected to their networks with the name AMPAK.
This also led manufacturers to change the network name of their devices. In the end, the odds you actually have an AMPAK-based device connected to your wi-fi are quite high.
However, it may also happen that the device that is under the AMPAK name is not yours and you don’t want it connected to your network. If that is the case, follow the steps below and get it off the list in no time:
1. Make Sure To Disable The Windows Connect Now Service
Windows-based machines come with a feature that was designed to enhance connectivity with other devices, servers, and web pages. This feature is called Connect Now and, even though it is normally activated from the factory, there is no harm in switching it off.
However, before walking you through the steps to turn off this feature, let us tell you a little bit more about it so you can come to an informed decision. The first feature of Windows Connect Now is a secure mechanism that allows access points such as printers, cameras, and PCs to connect and exchange settings.
Through Connect Now, computers and other devices have enhanced connectivity and their performance levels are increased instantly. Also, guest devices can perform connections easier when the Connect Now feature is switched on. So it that is an important feature for your internet set-up, take it into consideration before deciding.
So, prior to making up your mind as to switching off or keeping the Windows Connect Now feature up and running, take a moment to consider the outcome. However, if you do decide to disable the feature, these are the steps you should follow:
- First of all, you have to open the admin tools and go to the services tab
- Run the administrator tools on your device and get to the ‘services’ tab.
- From there, locate the WCN or Windows Connect Now feature and right-click on it to get to the properties. Since the
- list of services is normally sorted alphabetically, the WCN should be closer to the bottom of the list.
- Once you get to the properties, you will see a tab labeled ‘general’ and, in the tab options, a ‘disable’ option. Click on it to deactivate the feature.
- Now, get to the ‘service status’ option and click on the button that is labeled ‘stop’.
- Don’t forget to save the settings before exiting the window.
- Lastly, restart your device to ensure the changes are saved in the memory.
That should do it and the Windows Connect Now feature should be disabled. This may already remove some of the AMPAK names from the list of connected devices as they will no longer connect automatically to your wi-fi network. However, if some persist, move on to the second feature you should disable.
2. Make Sure To Disable The WPS
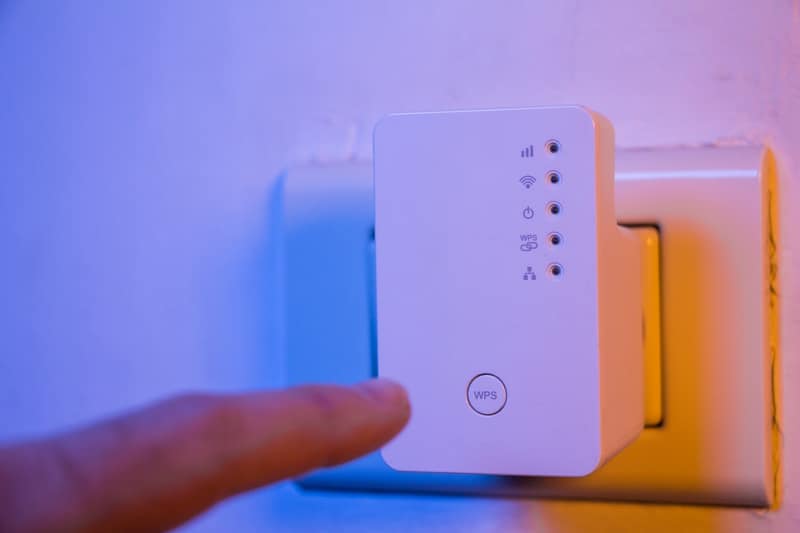
WPS stands for Wi-Fi Protected Setup and it is a security standard that allows users to easily keep a home or office network protected. With this kind of protection system, routers and other access points can establish safe connections with other devices by pressing a single button.
As the user presses down the WPS button on the access point and on the device that wishes to connect to the network, the link is established. It is an extremely practical way of establishing connections. However, with all its practicality, it lacks security.
Since any device can establish a connection by simply pressing a button, some networks became easy targets. Also, a high number of devices were connected to the network at the same time, which rendered it slow or unstable.
These are the main reasons why users started opting for disabling the WPS feature on their networks. If that is also your situation and you would like to disable the WPS feature, follow the steps below:
- The first thing you should do is access the router settings. In order to do so, type the IP Address found on the back of the router into the search bar of your favorite browser.
- Then, use your login credentials to gain access to the router options.
- Once the router control interface is running, locate the ‘wireless’ tab and go to the WPS options.
- Now, slide the on/off button to disable it.
- Once again, remember to save the settings and restart the device so the changes are registered by the system.
After that, the WPS features should be disabled and no unauthorized devices will be able to gain access to your home or office networks.


