If you are a Minecraft fan and you want to host your own server, you must know all about port forwarding and how it works. But even if you are a beginner and want to learn the basics of port forwarding and how you can set it up to make it work on your AT&T network. Here is how
Port Forwarding
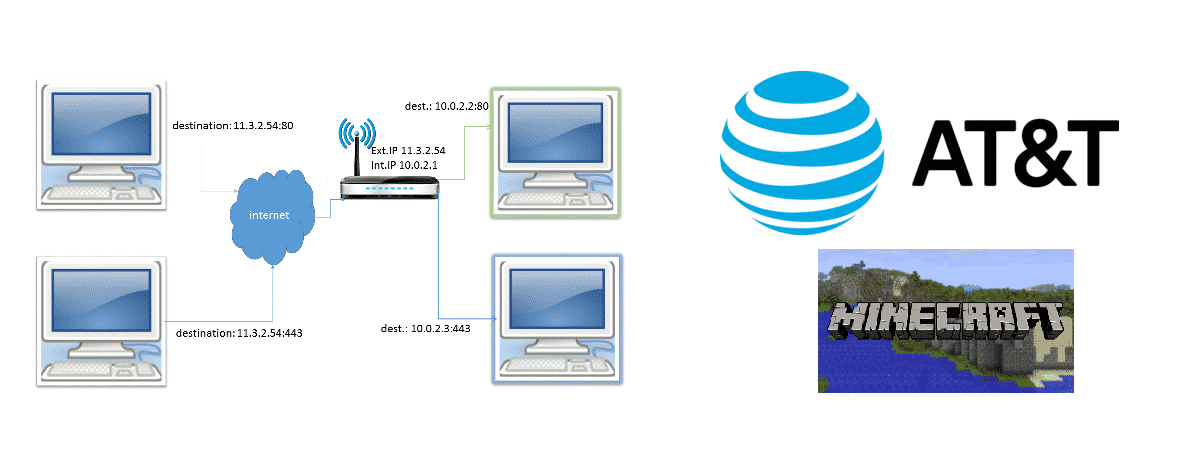
Port Forwarding is basically a method that allows you to access the incoming and outgoing data on your home network or devices from a remote location. Although, the system is not complicated at all. You might need to understand how it works and how you can set it up.
You basically set up a gateway that routes this data to where you want it to go, in this case, a remote device. You are setting all the rules for this data being sent or received on a specific port to a specific IP address on your home network. Port forwarding is an advanced subject and most people will not need to use it generally but it is highly useful under some circumstances such as running a sling box or streaming media devices. It also enables you to host photo-sharing hard drives that allow you to access the data on your own hard drive remotely, anywhere in the world.
Through port forwarding, you can access your home surveillance camera or a device remotely as well, or use remote access to your home computer. But what we are going to help you with today, is how you can use port forwarding on the AT&T network to host a gaming server for your Minecraft.
Minecraft servers can be hosted if you have the PC specifications capable enough to take the load and process all the data that is coming through and being sent on the server. You will need to follow the process below to set up a port forwarding for Minecraft on your AT&T network:
Ways How to Do AT&T Port Forwarding In Minecraft
1. Gateway settings
To start with, you will need to access your router or modem settings based on the device you are using. Once you have access to these settings, you will see a tab that has Gateway settings. These are the settings that can help you set up and manage gateways on your AT&T network. All you will need to do there is go to Settings>Firewall>Applications>Pinholes and DMZ.
If you receive a warning here, you need to check the AT&T port forwarding tool and enable port forwarding on it. Once you have it set up, you will need to access the firewall settings.
2. Firewall Settings
Under the firewall settings, you can find all the details of your account. Applications, pinholes, and DMZ is the list of applications that can use the port forwarding protocol. Under the application name, you will need to list the name of the application that you need to use the port forwarding for that is Minecraft in this case.
Once you have entered Minecraft to exempt from the firewall, you will need to select multiple other settings that are Protocol, Entering port or range to and from fields and protocol timeout. If you are unsure of these settings, you can contact AT&T for the right assistance and they will share the values with you that you need to enter here.
3. Host the port
After all the settings with a firewall, you will need to enter the default map to the host port. This will allow you to select the port that you want to be hosted for Minecraft. You can always host multiple ports if you want to and these ports can be used for Minecraft hosting server. After that, you will get the Application type and you need to select the closest description to the application you want to use the port forwarding for.
4. Finishing up
After you are done entering all the settings, you just need to click on Add to list and it will be added. You will be prompted to add the access code that will ensure security and you will need to enter that access code if you try to access the port from a remote location.
By following this simple procedure, you can set-up the port forwarding for Minecraft on your AT&T network and enjoy hosting your own server easily.